What Bob Ross can teach us about overcoming blank canvas syndrome in software development

“Blank canvas syndrome” is a paralysis you face as a creative when you’re starting a new project. If you’ve ever found yourself staring hopelessly at a blank computer screen at a loss for where to begin then you know how debilitating blank canvas syndrome can be. Fortunately we have a master artisan we can model who taught us through his 30-season TV show how to beat this paralysis.

What would Bob do?

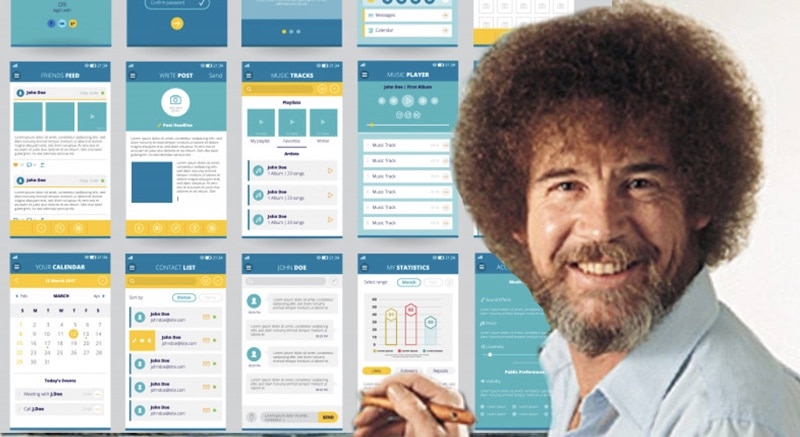
I grew up watching a TV show called “The Joy of Painting with Bob Ross.” Day after mesmerizing day this soft-spoken dude with the huge afro would convert a blank canvas into a work of art over the course of a 30min show. It was hypnotizing to watch him repeatedly actuate his vision out of nothing and step you through his thought process the whole way with his signature gentle, supportive style.

In this post I’m going to do my best to channel Bob Ross and spell out the advice I believe he would give us if he were alive today coaching us on how to build an application from scratch via nocode. The key, as with most layered creative challenges, is to peel it back one layer at a time and use reverse goal planning to start with the end in mind and work in layers moving from your big daunting idea to a fully-functional app. So let’s begin, friend.

Step 1: Crystalize your vision with an aspirational press release

Mental gridlock can originate from a handful of causes but almost always traces back to an ill-defined vision. One of the best exercises for getting crystal clarity on your vision up front is a technique I synthesized from two sources: an Innovation Game called “Remember the Future” and how Amazon does its product development via its “working backwards” methodology.

The gist of the technique is to imagine forward to some future point in time at which you’ve released your shiny new application and are publishing a celebratory press release that touts the benefits to your user. The process of writing that future press release accomplishes a few things, namely:

  1. It gets you thinking in terms of users and benefits and how to message the value proposition to your target audience. If you struggle with this exercise will reveal exactly where the holes are currently in your understanding of the landscape, market, product, etc.
  2. It yields an artifact that will be useful to you later as a north star by which you can make product decisions and ensure a team is all operating on the same page. It’s essentially a roll-up of a bunch of user stories into a concise high-level document which consequently….
  3. Allows you to deconstruct this vision in the next step to yield your constituent user stories.

In terms of the mechanism of how this works, the theory is that by projecting forward and remembering hypothetically backwards of what must have occurred up to that point to make the product possible you use different set of neural circuitry vs. trying to speculate forward from today. I admittedly don’t understand the psychological mechanism behind why this subtly different approach actually works but I can vouch anecdotally that it does work.

Bob Ross Equivalent Advice (BREA): Prep the canvas and get clear on your idea.

Homework: Write your aspirational press release for your proposed application. Bonus if you post it somewhere publicly and use it as a commitment instrument. If you need inspiration read the linked Quora article above. Here is mine for v2 of the Charity Makeover platform.

Step 2: Capture conceptual requirements of the MVP via User Stories

The next step once you have your aspirational press release is to deconstruct that document into user stories that capture the essential requirements of your minimum viable product (MVP).

User stories allow you to express functional requirements while remaining at a conceptual level (ie. not worrying about user experience – UX) and thinking in terms of stakeholders, goals and acceptance criteria. If you’re new to user stories I highly recommend this half-day course on Udemy for getting up to speed on how to use them effectively.

A way to get started here if you’re struggling is to take each of the main benefits you wrote about in your aspirational press release and think about the discreet blocks of functionality that would need to exist for each in order to enable it. You want to restrict your initial user stories to the bare minimum set of functionality necessary to deliver your MVP. Resist the temptation to go overboard in documenting every conceivable function your app might need to perform and keep it constrained to only those stories which directly support the benefits you enumerated in your press release.

You can use any tool to capture these. I’m a fan of Trello as it’s a free tool and allows you to put the user story in the title of each Trello card, any supporting explanation in the description and your acceptance criteria as a checklist on the card. I use a simple 4-column layout of: backlog, MVP, in progress, and completed.

Further explanation of user stories is beyond the scope of this post. The Udemy course referenced above is a fantastic resource for quickly learning the 80/20 essence of how to craft effective user stories.

BREA: Layer in the background and add some fluffy clouds.

Homework: Create a free Trello account and load it up with the user stories that represent the bare minimum functionality of your MVP. Go to sleep and review it the next day. Does it capture all the key functionality? If not add new stories until you cover all the major bases. Is there anything that’s overkill feature-wise for the MVP? If so, move those story cards to the backlog column. Here are my user stories for the v2 Charity Makeover build.

Step 3: Create a low-fidelity wireframe

Once you have your user stories you’re ready to move from the purely conceptual expression of the app into a rough visual sketch of the user experience (UX). The key here is to stay decidedly low-fidelity and not get derailed committing precision error by moving too prematurely to a hi-fi prototype. This is the intermediary step that is most tempting to skip in favor of jumping directly to building the clickable hi-fi mockup. But that’s a mistake that will lead to unnecessary angst.

There are a number of applications like Balsamiq Mockups for doing this part on the computer but I’ve found what works best is to ditch tech, stand in front of a white board and just start sketching screens.

Draw empty containers that mimic the proportions of the target screen resolution of your app (if you’re doing a mobile app, divide the whiteboard into a set of 8 or so rectangles that are roughly the same proportions of a mobile phone screen). Next you’ll work through each of the user stories in your Trello board and sketch out the screens necessary to deliver the functionality that fulfills the acceptance criteria of that story. You’ll find inevitably that some user stories share common screens. The goal is to get complete coverage so that you wind up with the full set of screens that facilitate all stories.

When your finished you’ll have a set of screens that constitute v1 of your application. Woohoo! That should feel good. You’re looking at the bare minimum set of UX you will need to create in order to deliver your app.

BREA: Complete all the major background scene elements with your majestic mountains.

Homework: Sketch out the low-fi wireframe for your application. If you don’t have a whiteboard, do this on a piece of paper (I find a whiteboard for whatever reason yields better flow than sketching on paper for this stage). Don’t erase anything. If you don’t have enough white board real estate to capture it all, move to the next step before you erase any screens. Here are my sketches for the v2 Charity Makeover build.

Step 4: Make a clickable mockup from your wireframe and get user feedback

Hold onto your butt. We’re going to make a quantum leap with a few minutes of work by converting your static whiteboard sketches into an interactive, clickable prototype of your application that you can share online and use to solicit user feedback. And yes, I’m serious this will take you less time than it takes Bob to paint a happy little tree.

Here’s what you do:

  1. Signup for Marvel App and download their iOS or Android mobile app.
  2. Take photos of each panel representing a screen of your application. Frame the photo so the edges are perfectly aligned with the container of the screen.
  3. Follow the prompts in the application to create a new app and add the photos you just took as the screens ol your application.
  4. Draw hotspots on each interactive element (buttons, lists, anything clickable) and link it to the target screen.
  5. Publish the app and copy the link.

You should now have a link that you can share like this one that yields a clickable low-fi prototype you can share with anyone. Testers can leave feedback inline while using the application with the comment feature and give you context-specific input about the UX for each screen.

BREA: Layer in the midground elements and add some happy little trees.

Homework: Use the free Marvel App to convert your whiteboard sketches into a clickable prototype and solicit feedback from at least five prospective users of the application. Now go through each user story Trello card. Can you check off the acceptance criteria in each? Are there any holes where the current prototype fails test coverage? Do not advance to the next step until you have input from at least five people who would be your prospective users and until you can in good conscience check off every single acceptance criteria item. This is the time to validate whether you’re truly building the right thing. It’s easiest to make changes before you move further so take advantage of this time to get the functionality right.

Step 5: Make a high-fidelity clickable mockup

Ok so you’ve validated that there is A) demand for what you’re building B) it’s got the right set of essential functionality and C) the UX makes sense to prospective users. If you failed A, B or C now is the time to make changes. Go back and redo step 4. Bob and I will wait 😉

Assuming there are no obvious structural changes required it’s time to move to a high-fidelity mockup. Depending on what tool you’re using there are different ways of doing this. Figma is great especially if you’ll be working with a team but is likely is overkill if you’re the one doing the implementation. Sketch & Invision are a good combo and good value. If you happen to be planning to implement in a nocode tool like Adalo or Bubble you can make the clickable hi-fi prototype in the tool itself and just forget about the data model for now and make the UI elements link to their respective target screens. Hat tip to this guy in the Adalo forums for pointing out this time-saving, brilliant technique. Bob Ross would throw some yellow ochre on the canvas and paint him a happy gold star for this trick.

Whatever tool you use, the goal at this stage is to make a clickable prototype that will be as close to a pixel-perfect replica of the final app that you can use for soliciting another round of feedback prior to investing in the final stage of brick-laying. Once you begin work on creating the data model and wiring up screens and design elements it gets significantly harder to make changes. Changes will be inevitable over time but the goal is to get it as right as we can out of the gate to minimize having to redo plumbing work once we’re past mockups and into building the actual guts of the app.

BREA: Layer in the foreground elements.

Homework: Make the clickable hi-fi prototype in whatever tool best suits your situation and gather one final round of user feedback prior to going to implementation. This is your last chance to make any substantive structural changes prior to incurring the inertia of design decisions which are harder to rework.

Step 6: Wire up the database & UI elements and implement the app

If you used a nocode platform to build your clickable hi-fi prototype this last step is purely a matter of wiring up the database and functionality of each UI element so that the app works. If you made your clickable prototype in a separate prototyping tool like Figma or Invision, there may be a streamlined way to port your prototype into whatever nocode tool you’re using to implement. Bubble for instance has a Figma -> Bubble import feature currently in beta that will bring over your prototype and get you 85% of the way there in building the app in Bubble.

Regardless of how good a job you did soliciting user feedback, there will always be new requirements and changes that come via seeing things from a new vantage point but the more robust feedback you solicit in the prototype stages, the more likely you are to nail the core feature set out of the gate.

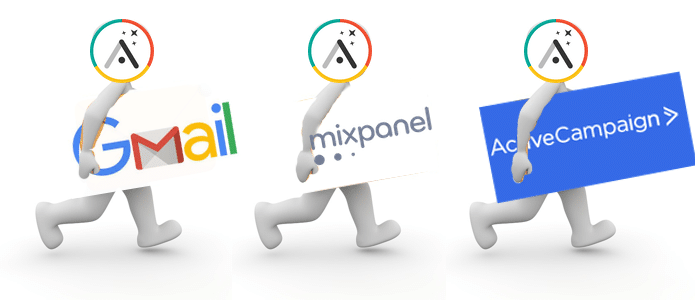
The other thing you’ll want to do at this point is to enable whatever you can for tracking how users are interacting with the application. Adalo has MixPanel integration baked in so it’s very simple to just create a MixPanel project and add your token to begin getting granular event data logged from the users who are using the app. Their cohort analysis and funnel analysis tools give you a wealth of insight on where the bottlenecks are and let you see the effect of changes you make over time on your user engagement and retention. Adalo also now has native analytics built into the platform which is nice because there’s no work required to leverage that now, but their analytics lack the sophistication of analysis that’s possible via something like MixPanel.

BREA: Add in all the shadows, highlights and detail.

Homework: It’s time to take your user-validated hi-fi prototype and turn it into a functional application. You should have a good level of confidence at this point that you’re building something your users will want and that should give you the motivational fuel to power through what is likely the most technically complex phase of this process. The good news is if you stall out at this point, there are plenty of developers via platforms like Upwork who you can bring in to complete the implementation. Having a clickable hi-fi prototype makes it much easier to direct a developer than trying to convey the end result you’re aiming for via some more nebulous means. If the app is so ambitious in scope that it makes sense to raise money to fund the development, you’ll have a way easier time approaching investors or running a crowdfunding campaign with a hi-fi prototype than without one.

Conclusion

We’ve covered a lot of ground having navigated through each of the six incremental stages of actuating your vision into a functional application. By breaking this process down into these gated stages we’ve both de-risked the chances of building the wrong thing as well as reduced our likelihood of having to make unnecessary changes later in the process. This also has allowed us to parallelize the marketing aspect as we can create full clickable product demos and begin to spin up the marketing efforts for demand generation without having to wait until development is complete. Lastly, by taking these intermediate steps and reverse goal planning from an aspirational press release, we’ve backed our way into our grand vision with baby steps between each layer enabling us to beat the dreaded blank canvas syndrome at each step of the way.

I hope you find these prescriptive steps useful in actuating whatever your vision is. If you need help with this stuff, Grid7 is launching an exciting program in which we partner with select early-stage founders to help execute your MVP. Sign up below for consideration in that program.

Run your own Adalo-based crowdfunding app to fund your next project


Crowdfunding platforms like Kickstarter and Indiegogo are amazing in how they enable makers to rally early support, de-risk product ideas and fund the development of products which otherwise might not have been possible. Crowdfunding forces you to nail your sales & marketing early and win early supporters thereby helping you avoid the all-too-common trap of building something nobody wants nor needs. My buddy Gabe is running an Indiegogo now which has already raised over $30k for his graphic novel project – Amazing!! For all their benefits though these platforms have some downsides, namely:

  • Fees: Both Kickstarter and Indiegogo take 5% of the funds raised on top of 3-5% for payment processing for a total of 8-10%.
  • Not geared for software projects: These programs seem to be largely aimed towards physical consumer products- gadgets, art projects and such. This means unfortunately that…
  • Distribution benefit is nil: if you’re seeking to fund a software project you’ll likely be using the platform for its crowdfunding functionality but end up being responsible to bring your own audience which means you’re not getting additional reach or exposure of their user base.
  • You have to message backers via their system: which is less ideal than building your own email list.
  • Funding model: In some cases it’s an all-or-nothing funding model. For example with Kickstarter if you set a $10k goal for your campaign and fail to raise that before the completion date, you get none of those funds. That force you to set conservative funding targets but can result in a bunch of work with zero return if you set the goal post too high (Indiegogo is different in that it allows you to keep whatever you raise).
  • You’re subject to their rules: This may not be a huge deal but you’re at the mercy of their guidelines and their approval.

I explored building a Kickstarter or Indiegogo campaign as a way to de-risk and fund the development of the Charity Makeover v2 platform but couldn’t bring myself to pull the trigger for the above reasons. But after researching these platforms I had an epiphany: use nocode itself to build a personal Kickstarter I control and run my campaign via that.

One day later I had built this app.

Design-wise it’s not going to win any awards but it’s a fully-functional crowdfunding system complete with email capture, Stripe integration, progress meter, CRM, donor wall and viral social media share widget on the thank you page. With this app you pay only Stripe fees, get all the emails AND they feed directly into any CRM that has a Zapier integration so you have all the control of being able to kick off whatever drip emails you need to indoctrinate your backers.

Adalo just announced a “cloneable apps” feature which means I can now share this app with you. You can clone it to your own account here.

This gives you an option wherein you have the main benefits of those 3rd party crowdfunding platforms while keeping control of your own destiny and running it under your own Adalo and Stripe accounts. We’ve used it already to raise $1500 towards our $10k goal with this project for the new platform rewrite.

If you use this and derive benefit from it consider becoming one of the first 100 backers for the Charity Makeover launch sponsorship program at whatever level you believe represents the value you received.

How to add a Facebook share widget to your Adalo application


Social media sharing widgets when placed strategically at various points in your application allow you to leverage your happy users as a free marketing channel for getting extra distribution. In this tutorial I’ll show you how you can embed a Facebook share widget within your Adalo application using the webview component.

This tutorial was requested as additional clarification to a brief response I made in the Adalo forums here. It’s also a feature request that has been upvoted 22 times as of this writing.

This video shows the full process start to finish:

Basically the steps are these:

  • Use the sample code from this page of documentation on the Facebook Developer portal and modify the values so they represent the page you’re intending to make sharable.
  • Put that code somewhere where it can be served publicly (either on a webserver you control or in a Amazon S3 bucket set to public).
  • Lastly, create a webview component wherever you want the share button to appear and have it call that .html file.

If you needed to make the widget reusable across multiple pages on your site you could make it a .php file instead of a .html file. This would be useful if you wanted to make it so each user of your app could share a unique tracking link or their own user profile link. The way you would do that would be to echo the REQUEST_URI variable or if you wanted to manually specify those params when calling the code via the webview component you could pass them in via the query string and have the script populate them that way.

This same technique can be used to embed sharing widgets for the other platforms. You can find docs for Twitter and LinkedIn respectively. If you’re intending to add a bunch of these buttons the easiest thing would be to create a ShareThis account, register all the services there and then just reference that in the webview component.

Let me know if you have any questions. And as always if you want a monthly summary of useful tips like these in your email inbox be sure to opt-in for my “Inbox Insights” below. cheers

3 ways to send email from Adalo using Gmail, MixPanel & ActiveCampaign

Adalo makes it easy to send in-app notifications to users but when it comes to sending emails it’s conspicuously deficient. There’s currently no way to natively send an email based on activity within the app.

I’m going to show you today three different approaches for solving this problem, all of which rely upon external systems for sending the email. We’ll look at the pro’s and con’s of each approach and then do a video tutorial that shows how to set it up in each scenario. When we’re finished you’ll have all the information necessary to pick the most appropriate method for circumstances and solve email delivery from within your Adalo app.

The pro’s and con’s of each method

While Adalo doesn’t natively have the ability to send email it does enable different approaches via middleware and its integration with MixPanel. Given the use of middleware there are infinite ways to connect to external systems but I’m going to show you three approaches using Gmail, MixPanel and ActiveCampaign for sending email. Let’s explore each one:

Gmail

Using middleware like Zapier or Integromat it’s possible to invoke an external system like Gmail to send the message.
When to use this approach: If you’re just seeking to send a single email immediately to a user this is likely your best choice.
PROS: It’s free, it’s fast and it will originate from your Gmail account so it should have the same deliverability as a message you would send from Gmail.
CONS: It’s a “dumb” send in that there’s no sophistication of wait timers or conditionals and there’s no unsubscribe link so if your users decide to hit the spam button it’s going to diminish the deliverability of your main email address. You can address this by using an alias with a different sending domain but this is something you should be aware of.
How to set it up:

MixPanel

When to use this approach: This is a good method to use if you’re already making use of MixPanel for your app’s analytics and therefore have key events for your app defined in MixPanel.
PROS: Free up to 1000 tracked users. Their pricing here. MixPanel is a powerful tool for event-based tracking and gives you the ability to analyze funnels, do cohort analysis for retention and slice & dice on any property you’re tracking. Their customer journeys and messaging features allow you to send emails that are triggered when conditions you specify are met. You can build complex sequences that send your users relevant communications based off what they have or haven’t done in your app.
CONS: The customer journeys feature is still in beta and has some quirks to it. The way Adalo passes event data to MixPanel is unintuitive and means you need to write custom formulas to interpret the raw events and do anything useful with them. It’s a bit like sipping through a straw in that you only have access to event data tracked in MixPanel and therefore can’t use data from Adalo collections in your emails.
How to set it up:

ActiveCampaign

When to use this approach: Use if you’re seeking to have an external CRM outside of Adalo tracking your users and automating communications.
PROS: ActiveCampaign is a full CRM with a powerful visual editor for building automations and workflows. Contacts can store data in tags or custom fields and this info can be used to trigger automated messaging, SMS, site messages and anything you can do with a webhook post request.
CONS: Not free. ActiveCampaign pricing here. You end up duplicating contact data outside of Adalo which can lead to data inconsistency and the overhead associated with keeping data in sync.
How to set it up:

Other considerations

We could have used the Custom Actions feature in Adalo to trigger the middleware via web hook and there can be times when that’s desirable. I chose decidedly not to use that approach in this scenario because it would yield a more brittle solution given that we sometimes manually add event attendees via the backend Adalo interface and keying off of a button press in the app would mean the emails would not send in that scenario. In general it’s a good idea to craft your solution in a way that is most resilient in the face of variance and by keying things off the Zapier “new record” trigger it becomes irrelevant how that record got there (whether it came via self-signup in the app or manually via our intervention in the admin).

I didn’t show the Sendgrid approach for sending email because it requires a $100/mo subscription to their PRO plan in order to make it work with Zapier. You could use custom actions in Adalo to call their API directly and do either a single send or initiate a full marketing campaign sequence. This would be yet a fourth way to send email from Adalo but I didn’t go down that rabbit hole for this post.

Conclusion

You now have three different approaches for sending email from within Adalo and can choose the most appropriate method given your circumstances. If you have any questions on the techniques shown above please leave a comment below. If you’d like to receive an occasional email from me teaching methods like these sign up for my email list below. cheers

A 5-step universal framework for better outsourcing

You’re handling a bunch of tasks that you know you should be offloading to a virtual assistant. This daily operational muck will monopolize your time and keep you mired in place until you figure out how to extricate yourself. Welcome to operational quicksand.

Photo credit Wikimedia Commons

You may already know you need to delegate and may have even already attempted to do so through outsourcing but had a bad experience. Or maybe it’s something you’ve put off attempting because you dwell on the number of ways it could go wrong:

  • What if you get a bad apple worker and they screw things up?
  • What if you find a great worker but it turns out that training and supporting that person takes up as much time as executing the tasks yourself?
  • What if you find that unicorn perfect assistant, you’re able to efficiently train the person but then he/she leaves after you’ve invested all that time and you then have to start from scratch?

These are all valid concerns.

The good news is there’s a repeatable playbook you can use to reliably build up a bullpen of low-cost, high-skill outsourced talent that will permanently free you from the operational muck. Forever. And it’s a method you can use regardless of what industry you’re in or what role you’re hiring for.

Before we get there though, let’s first look at how the traditional approach to outsourcing typically goes wrong.

How outsourcing typically fails

The problem with the traditional approach to outsourcing is it’s not a system. This is one of my favorite quotes:

“If you can’t describe what you are doing as a process, you don’t know what you’re doing.” – Edwards Deming.

If you’ve tried and failed with outsourcing before chances are your experience went something roughly like this:

  • You had a specific job you needed done and went to a service like Fiverr or Upwork.
  • You posted a job and got a bajillion applications.
  • Applicant quality was all over the map but you settled on the one that seemingly sounded like the best fit from the heresay of his/her cover letter and skill set.
  • You awarded that person the job.
  • And you got back a result that missed the mark, possibly in a huge way. Maybe communication was difficult or they went dark indefinitely or they just didn’t truly understand the goal of the project and fundamentally botched the outcome.
  • You closed your laptop lid in disgust and wrote off outsourcing as a waste of time and went back to doing all the muck work yourself.

If your experience approximated this trajectory you’re not alone. Sadly this dysfunctional scenario plays out daily on these outsourcing sites despite all the ratings and reviews and technological checks & balances that exist. You know why? Because no amount of technology will solve a problem that’s happening on a different axis. The fundamental failing here comes down to this:

You bet on hope as a strategy instead of betting on a system.

Hope is not a reliable strategy. A system is.

My hero Jermaine Griggs has a brilliant saying: “A SYSTEM is Something You Stick To Emphatically and Methodically.”

Note nowhere does that definition say anything about technology because a system does not equal technology. It can incorporate technology but a system is just the deterministic playbook you execute that ensures you have a process to get you reliably closer to your goal.

A system makes it so you don’t have to bet on hope anymore.

I’m going to now show you the system I use for recruiting, vetting and working with outsourced labor. This methodology works regardless whether you’re outsourcing website development, podcast production, graphic design, lead generation, or baking cakes. It’s axiomatic and predicated on three different patterns that I call the “horse race,” “airlocks” and “fail canary” patterns.

How it works

The gist of this method is to remove the guesswork from recruiting outsourced labor and make it a data-driven game. You will be setting up essentially a mini “horse race” with multiple candidates that will ultimately reveal who your winning horse is empirically. Note: when I refer to “horses” in this context I’m purely using this tangible analogy to drive home the crux of the technique and not seeking to dehumanize outsourced labor nor imply they’re like horses.

Photo credit Pixabay

The “Horse Race” is the controlled experiment which gives you apples-to-apples comparison of potential candidates in a real-world scenario.

“Airlocks” is the method by which you partition and parallelize the work amongst the horses in the race.

And “Fail Canary” is the technique you use to screen out candidates up front who can’t follow instructions.

So without further ado, here are the five steps and how these patterns work together:

  1. PREPARE: Develop a challenge that will test the primary skills you’re hiring for. If you’re hiring a full-stack web developer to build custom functionality for your WordPress site you could enumerate a set of features, sketch up a few screens and talk through it in a video. If you’re hiring a graphic designer to spruce up your site you can craft a redesign project with the goals and constraints defining desired styles, exemplary sites, etc. The point is to create a project that captures a good cross section of the work they will be doing with you over time and that won’t be solvable in two hours but can reveal meaningful progress in that time.
  2. RECRUIT: Create an account on a service like Upwork and post the job requirements. I’m a huge fan of using Trello and filming a Loom video walkthrough for this part (here are a few examples from a couple past mini projects). This is where I typically include a “Fail Canary” to screen out candidates who are incapable of following instructions. In the video up front I tell them I’m running a screening test to hire 1-2 contract workers who will be on retainer long-term with me and will be paid their full hourly rate for their participation in this preliminary screening test. I tell them they need to watch the full video explanation of the project and follow all instructions in order to qualify. Then at the end of the video when I’m done explaining the project requirements I ask them to parrot back their understanding of the project, how they propose to solve it and ask for an extra random bit of information like “what is your favorite food?” Failure to provide an answer to this “fail canary” question disqualifies them from consideration. While that might sound harsh this is your first filtration mechanism for screening down your pool of applicants to those who can follow instructions.

    You can further screen using proxy requirements. Here’s what I mean by that: you may be hiring for a PHP dev role but what are the adjacent skill sets which identify a truly progressive dev who is on top of his/her game, well-rounded and focused on continuous learning? For this scenario I’ll further constrain my pool of applicants by including a tangential skill set like “Angular JS” “Node JS” or “Laravel” because finding the intersection of those two skill sets tells me this is a person who is at the forefront of his/her craft pushing the boundaries and learning complimentary frameworks that separate him/her from the pack.

    Your job now is to canvas the available pool of potential hires and invite the most desirable candidates to fill your recruiting funnel. Your only goal at this stage is to get job applications from qualified candidates who demonstrate they understand the job and at least seem competent in their proposed approach for solving the challenge. Systems like Upwork enable you to search available candidates based on defined skills and quickly invite them to your position. You can copy/paste your invite or personalize it depending on how your funnel for qualified applicants is looking. If your invites are getting declined more often then not, consider taking a few extra seconds to personalize them.

  3. SCREEN: You should now have a pool of qualified candidates and your job from here is to winnow down to the 4-5 ones you think are best. Hopefully they’ve all submitted a cover letter fulfilling your request to summarize their understanding of the project, their proposed approach for addressing the challenges and their fail canary response. And ideally they’ve sent you a video instead of a cover letter. A video can reveal a lot about communication and personality style. You should have at least 10 qualified applicants at this stage. If not, keep recruiting until you do.

    Once you have your 10 applicants evaluate them on the info you have at hand, namely their job application and their past track record of job completion and comments from previous clients. You’re now going to invite the most desirable horses to your horse race and equate the track on time or money so it’s a level, objective playing field. You want to award this project to 4-5 candidates and ask them to complete a fixed chunk of work towards solving it. I like to hire people for 2hrs at their full hourly rate. Alternatively you could pay each for $50 worth of work and let them work however long that gets you as a function of their hourly rate. The key here is to have a common fixed-length racetrack for the horse race so there can be a clear winner. I find it works best to fix on an allotted time block and just pay the different hourly rates. You will be admittedly paying 5x for the same piece of work in this mini-project but you will be gaining an invaluable apples-to-apples comparison of real-world work experience in the process that will help you definitively pick your winning horse tomorrow and avoid weeks of working with the wrong candidate.

    Once you’ve awarded the jobs to your applicants it’s horse race time! Aaaaaand they’re off….

  4. EVALUATE: Depending on the complexity of the role, the job and what you’re testing for you may want to invite each candidate to use whatever project management infrastructure you usually use. The more you can test the candidates in a real-world scenario of how they’ll actually be working with you, the better. I like to invite my applicants as single-channel guests in a Slack channel setup for the project. Encourage questions if anything is unclear. Gauge their performance on the dimensions you care about: how responsive are they? What is the quality of their communication? Are they big-picture-focused and goal oriented or following a spec with blinders on with no eye towards the end goal? If you’re testing collaboration, are they cooperating with other candidates in Slack? How is the quality of the final work product? Did they come back with proposed improvements that indicated they thought deeply about the problem and found a better solution? If so, congrats you’ve found a gem.
  5. AWARD: So who was your winner? Typically the performance graph you see looks something like this:

    Photo credit Pixabay


    You’ll have one that did pretty well, two who gave a very lukewarm performance, one who was running perpendicular to the race track and one who nailed it. Double-down on that lead horse. If you lucked out and had two who nailed it this is how you build a bull-pen of fallbacks and/or scale to parallelize work and have multiple workers going simultaneously. Don’t burn bridges at this point. Respectfully report the results to everyone who won’t be hired back and congratulate your lead horse on crushing it. Open a standing contract with that person and at this point you almost certainly want them as a single-channel Slack guest and in whatever other project management systems you use. I recommend paying slightly over their full hourly rate so that if they get busy they prioritize your jobs. Paying $1/hr extra is peanuts to you but could be a 5% pay increase for them. Also, take time to get to know your contractors, their family situation, what they like to do, when their holidays are. I guarantee 90% of his/her clients don’t do that so this is yet another opportunity to strengthen the relationship at no additional cost and this rapport can prove invaluable later when inevitable misunderstandings arise.

The role of “Airlocks”

We didn’t talk about the “Airlocks” pattern and what that is so let me briefly explain. Airlocks is a term I use for compartmentalizing and ensuring an air gap to your production system so that you can have a safe sandbox for untrusted labor to work without exposing you to security risk.

Photo credit Wallpaperflare

This is situation-specific to your circumstances vs. a blanket one-size-fits-all recommendation but let me give you some examples:

  • If you’re hiring for WordPress development, clone the site and create a separate site sandbox for each developer.
  • If you’re hiring a VA to produce your podcast, create a dummy account for each worker in whatever system you’re using (ie. Anchor.fm).
  • If you’re hiring a graphic designer, give them read-only access to the media assets in Gdrive or Dropbox and give them a private write-enabled sub-folder just for them to save their work product.

As you identify winning horses over time you will obviously need to open the kimono to various systems and grant access. I’ve become a huge fan of the open source team password sharing system Passbolt. There’s a Digital Ocean droplet for it and for $6/mo you can get a really elegant system for granting and revoking access to your key systems with tiered trust levels. Very useful. Obviously change your passwords when you let people go just as you would with a traditional full-time employee.

Antifragility

There’s one last thing we need to talk about: what happens if/when you lose your lead horse? Turnover is a reality with any form of employment and people move on for a variety of reasons. One of the beautiful features of this approach to hiring is it’s particularly resilient in the face of turnover- I would even argue it’s anti-fragile in that the system actually becomes stronger in the face of turnover.

This is my actual documentation for my VA Marko from Macedonia who handles the production of The Nomad Podcast. Marko is amazing and for $50/episode he takes 6hrs of production work off my plate. We have a great relationship but if Marko won the lottery tomorrow I’m guessing he would move on and cease producing my podcast. What then?

The elegance of this approach is that I still have all the scaffolding that I created to recruit and train Marko, the original job posting with the screening challenge, the documentation above and all the Slack history of answering his questions. If I had to find another Marko at this point, the playbook is already written and just needs to be re-run. That’s leverage, that’s efficiency and ultimately that’s peace of mind.

Conclusion

We’ve covered a lot of ground here: the why for outsourcing, the ways it goes off the rails, a bulletproof system for reliably getting and working with the best talent. Once you have the outsourcing superpower you begin to win back your time, escape the operational quick sand and conquer increasingly difficult challenges with less stress because now not only do you have a solution but rather a system that solves. Yay. Proper use of outsourcing is a massive strategic advantage for you and having a bulletproof method for consistently finding the best talent faster than others puts you at an advantage amongst this advantaged subset. Remember if you can’t describe what you’re doing as a process…

If you enjoyed this post join my email list for exclusive tutorials on how to increase your leverage. Happy outsourcing.

Lateral thinking and “Flintstoning” your way around technical problems

Sometimes the best solution to a problem is to step around it.

When was the last time you butted your head against a technical challenge and had several failed attempts to solve it? Maybe it was due to limitations of the platform you’re using or limitations of your own technical ability. Or maybe it was just a really freakin’ hard problem to solve that is solvable via technical means but not ultimately worth the energy for doing so.

Sometimes the best solution isn’t to “beat the problem” so much as to side-step it with a human-powered solution. I’m going to show you a technique for doing this called “Flintstoning” and give you some guidelines for how to identify situations where a low-tech Flintstoned solution might make more sense than tackling the problem head-on.

What is Flintstoning?


Flintstoning is using human power under the hood to solve what would traditionally be a software-based problem. I first heard this term back in 2006 via Cambrian House. It’s typically used in the context of doing things in a decidedly-manual way early on in a startup for the sake of learning a process inside & out before you try to automate it. But it’s valuable in other contexts such as in the case where you have a particularly elusive technical challenge that meets a certain set of criteria.

When does it make sense to Flintstone?

If you can answer yes to these five questions it’s likely that your problem is a good candidate for a Flintstoning-based solution:

  1. problem is particularly “fuzzy”
  2. a human can do the task cheaply
  3. easy to expose an interface
  4. costs of solving via software-powered outweigh value of problem
  5. does not need to be solved in real-time

Let me give you a concrete example of a good Flintstoning solution candidate from a comment on one of my recent YouTube videos:


This guy Tapan is asking if it would be possible to use my hack with browser-based automation for essentially doing periodic garbage collection clearing out unused photos in his database after a certain time period.

Browser-automation really isn’t the right tool for this. He needs the equivalent of a cron process that runs in Adalo and handles this but Adalo currently has no concept of time-based system generated tasks so he’s scratching his head trying to figure out how to automate this garbage collection process.

Rather than engineering a technical solution I suggested he just hire a virtual assistant (VA) to log into his app weekly and clean out the unused images in the database. Given how Adalo works with the ability for two apps to share the same database it’s trivial for him to create a special admin interface for his VA with heavily-restricted permissions that enables that person to handle this without creating any real security risk. With maybe two hours of work between recruiting and tasking the VA and writing a quick visual interface his garbage collection problem is solved with no more head butting. He’ll pay a few dollars each week in VA fees but has saved would could be a couple thousand dollars in dev work and has the problem handled immediately so it’s a massive win.

Considerations and tools

Obviously not every problem lends itself to being solved in this way but by going through your feature backlog and analyzing what’s on your plate dev-wise using the above five questions, you may find you can knock out a bunch of features using this technique in short order.

I have a few VA’s from Upwork on retainer in Slack with standing open hourly contracts and for situations like this I can simply record a Loom video and task them in situations like these. This works well for situations when there’s a bit of context required to understand and complete the task and it’s low-priority and infrequent work that’s required.

For situations where the work is more mindless, 24/7 and needs to scale beyond what one person can handle Amazon offers a service called Mechanical Turk to programmatically task humans with small jobs called HITs (human intelligence tasks). It’s basically like a realtime eBay of grunt work in which you’re farming out this labor via microtransactions of a few pennies from within your app. That’s a topic for another post but a powerful tool to have in your arsenal.

Conclusion

Next time you find yourself going down a rabbit hole of failed technical attempts at solving a problem, use the questions above to determine whether your problem is a good candidate for a Flntstone solution. It’s a win all around with you getting a cheaper/faster/resilient solution in place while also employing someone who is happy to have the work.

In a future post I’ll deconstruct the two main underlying principles of this technique of Flintstoning which are two design patterns I use called “Inversion of Control” and “Airlocks.” I’ll show you how those are like lego blocks that can be used in conjunction with a third I call the “Horserace” pattern to solve hard problems creatively. Be sure to join my email list if you want exclusive content like this around automation, leverage and lateral thinking in your inbox. cheers

UPDATE 6/10/20: This post got some traction on Hacker News yesterday and a few people pointed out in the comments that there is already another name coined for this technique: The Wizard of Oz Paradigm. Name it whatever you like. The important takeaway is that this technique of software-invoked human intervention is a powerful fudge factor to use in your apps that can give you a superpower for solving a class of problems that would otherwise require unjustifiable time & dev resources to solve.

How to save time & frustration by automating repetitive browser-based tasks

Today we’re going to look at how to automate hours of mindless busywork using a free open source piece of software called “Katalon Studio.”

The specific challenge we’re automating is the bulk deletion of records in an Adalo collection. Currently the Adalo tool (as amazing as it is) offers no way to wipe all the records in a collection. Currently your only options are:

  1. Drop and recreate the collection, which then means you have to re-establish all the relational connections to other collections not to mention rewire all the data in the screens that reference that collection.
  2. Go through one by one and delete each record individually.

No bueno either way.

I talked to one gentleman in the Adalo forums who had this issue and he had 5k records to delete.

Unfortunately he tackled it the manual way before I had the chance to document this method. Guess how long that took him?

That’s four hours of mind-numbing work. Computers are meant to work for us, not the other way around. We can do better.

I’m going to show you now a superpower in how you can take a four-hour task like this one, automate it once and solve it forever. So let’s get started.

Browser automation with Katalon Studio

Katalon is an open source piece of unit testing software based on the Selenium project. It’s entirely free to use. It’s typically a tool for QA testing in software applications that allows you to run a set of unit tests on an Android or web application. We’re not going to use it as a testing tool though. We’re just using it to perform the busywork we don’t want to do here.

The easiest way to tinker with Katalon is to get the Katalon Chrome Extension and play with it in your browser.
We need the looping capability which is only present in the desktop version so you’ll need to download and install that before you go on.

Showing it in action

First check out how the end result works in this video:

That’s four hours of your time you win back not to mention in the process you acquire a new superpower which can save you from future scenarios like this…

This video shows you the steps necessary to build the script I used in the above video:

The basic procedural steps here are:

  1. Record the initial automation.
  2. Fix anything that needs to be parameterized as a variable.
  3. Loop just the repetitive portion so you’re not wasting time on unnecessary steps.
  4. Execute the script and go do something fun while your computer is working for you 😉

As I mentioned in the video there are other further optimizations that could be made to the script to make it even more dynamic, like setting the number of loop iterations based on figuring out the record count of the items in the db… but, diminishing returns.

Additional resources and ideas

If you happen to have this exact scenario and just want to delete a bunch of records in Adalo, I put the Katalon Studio deletion script in Github. You can just download it and change the start URL to your Adalo collection and update it with your username/password and it should work without any other modification assuming nothing changes in the Adalo interface between now and then.

And that brings up a good point about this tactic: it’s incredibly powerful to be able to automate anything you could do in a browser but unlike API’s, user interfaces are prone to changing. If Adalo changes anything about how their user interface works it will likely require updating the script to work. It’s somewhat resillient because it uses Xpath and regular expressions for finding elements on the page but this this is something to be aware of about this approach is that it’s inherently brittle based on UI.

The best resource I found for learning the basics of Katalon was this free Udemy course. One of the great things is that there are a ton of people on Upwork who know how to write browser automation scripts so if you don’t have the time or ability to generate this (and you’re comfortable giving access to whatever system you’re using to an outsider) you can hire a freelance engineer from Upwork to write the script for you. Win-win, they make a few bucks and you save a few hours…

I’ll write up in another post the process I use delegating something like this to Upwork. That’s a whole topic unto itself but even that can be automated 😉

I hope this technique saves you time and frustration and frees you up to do something else productive. If you want to receive more awesomeness like this from me be sure to join my email list below. Happy automating.

How to create a star ratings component in Adalo

If you’re building an app in Adalo and seeking to give your users the ability to leave star ratings, it can be confusing because there are infinite ways to skin that cat. How do you handle displaying the star review? Do you modify a numeric field in the listing table? If so how do you track new reviews and prevent gaming of the system by users repeatedly reviewing listings?

I’m going to show you a simple technique for how to accomplish all this and in the process teach some lessons around visibility rules, custom formulas and a key principle of database design.

Questions on how to do this come up quite a bit in the Adalo Forums and it’s one of the more requested components in their feature request system. The technique I’m about to show you is what I used in building a kiva clone for us at Charity Makeover to add progress meter functionality for donations.

In this video I’m going to demonstrate from scratch how to build a simple wine listing directory app with a 5-star review component.

The first video sets everything up from scratch to the point of being able to review the wine:

And this second video shows how to display the star ratings and rating count:

That is the 80/20 of how you do it. Something I forgot to show in the video is you’ll want to use the Round() function in the custom formula for the magic text that generates the star graphic. As it stands now if I were to add one more rating that made the review average something like 3.33333333 it would break the graphic. But to prevent that scenario you just do this:

Leave a comment if you have a question about anything in the videos and if you enjoyed this tutorial you’ll love getting my emails. Sign up below.

Improving the first-time user experience in your Adalo app with smart visual onboarding prompts

Getting your users over the “suck threshold” sooner

You’ve worked hard to build a great app and have done a bunch of work to promote it. You’re getting signups but too many of your new users are fizzling out and leaving before they get their first win in your application. Kathy Sierra calls this getting over the suck threshold:

Image credit Kathy Sierra

You need to improve your first-time user experience but how do you do that? How do you help your users get over the suck threshold faster?

If your app is built in Adalo you can easily create a custom walkthrough overlay that hand-holds your new users through the steps necessary to get them their first win. This overlay will conditionally display custom visual cues to your users in sequence until they take the necessary actions that get them to the point where they’ve accomplished something that makes them want to come back.

What’s different about this approach

You’ve undoubtedly experienced one of those visual walkthroughs when first logging into a new software application.

It likely took the form of a tour that explained the gist of how to get started and maybe it was even interactive, but chances are it was a canned, one-time, linear sequence – essentially a slide show. The technique I’m about to teach you is better because instead of being a one-time canned tour, it’s a smart, persistent set of visual cues that handhold the users through a series of steps until they achieve their first win.

Why this matters

What is the impact of getting more of your users past the suck threshold early on? Well for starters:

  1. More engagement means less churn/attrition and a wider funnel.
  2. Every dollar you spend on advertising or hour you spend on organic traffic promotion yields more return.
  3. New user satisfaction improves and consequently…
  4. Referral rates on your application go up because your users are delighted with the experience.

Boom! For a few minutes of work this technique pays dividends indefinitely unkinking the hose with your new signups. So let’s dig into the nitty gritty of how it works.

How it works

The video below shows you first the front-end experience as a new user so you can see how it works:

And this video shows you the back-end of how to create this experience in Adalo using layers of elements with nested visibility rules:

Pretty cool, right? Try it out with your own app and see what it does to your new user engagement. Post any questions on this technique in a comment below.

This is my first post. I’m trying an experiment for the next month documenting a bunch of useful insights I’ve gleaned from having worked with various nocode tools and platforms for the past few years. If you want to get juicy tips like this one join my list below. And if you found value in this the greatest compliment you can pay is that of a referral or a social share. cheers